Meta Description: Discover how to install garage door weather stripping for Keller TX homes. Follow this trusted 2025 guide to seal your garage against drafts, dust, and Texas weather!
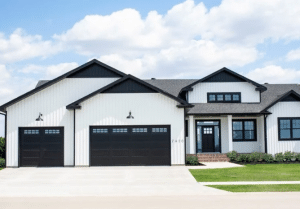
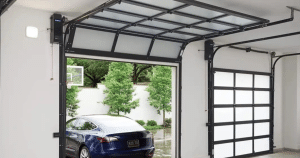
Discover how to protect your home from the elements with proper garage door sealing. Texas weather can be harsh on homes; one often overlooked vulnerability is your garage door. It’s time for a solution when gaps allow drafts, dust, water, and pests to enter. Keller TX Garage Door experts recommend learning how to install garage door weather stripping to maintain energy efficiency and protect your garage contents. This comprehensive 2025 guide will walk homeowners through selecting the right materials and completing a professional-quality installation that meets Keller’s unique climate challenges.

Why Weather Stripping Is Essential for Your Keller, TX Garage Door
Keller’s Climate Challenges — Why It Demands Proper Sealing
Homeowners in Keller, Texas, face distinctive weather patterns that make garage door sealing particularly important. The region experiences humid summers with temperatures exceeding 95°F, while winter can bring surprising cold snaps, strong winds, and occasional storms. These climate factors create a perfect storm for your garage door, with humid summers and wind-driven Texas storms pushing moisture against your garage door seals. Energy loss through gaps occurs year-round, forcing HVAC systems to work harder and resulting in increased utility bills. Seasonal temperature fluctuations cause garage door materials to expand and contract, gradually widening gaps.
Benefits of Installing Weather Stripping
Investing time in proper garage door sealing yields benefits that extend beyond keeping the elements out. It reduces energy costs by preventing temperature-controlled air from escaping and outdoor air from entering, potentially saving hundreds annually on heating and cooling expenses. Quality weatherstripping blocks dirt, pests, and moisture from infiltrating your garage space, protecting vehicles, tools, and stored belongings from damage. It also extends the lifespan of your garage door by reducing strain on opening mechanisms and preventing premature wear of door components.
Choosing the Right Type of Garage Door Weather Stripping
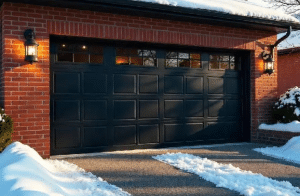
Bottom Seals: The First Line of Defense
The bottom seal of your garage door prevents water, debris, and small pests from entering underneath the door—arguably the most vulnerable area for infiltration. When selecting bottom seals, homeowners should consider the differences between rubber and vinyl materials. Rubber offers better flexibility in temperature extremes but may deteriorate faster, while vinyl provides longer-term durability but less conformability to uneven floors. Experts typically recommend EPDM rubber seals for Keller residents because of their excellent performance in high heat and occasional freezing conditions.
Side and Top Seals: Stopping Drafts & Rainwater
Side and top seals complete the weatherproofing system by sealing the perimeter of your garage door when closed. Foam or brush seals provide excellent protection against drafts and light rain while allowing smooth door operation. Vinyl fin seals offer superior water resistance for areas prone to wind-driven rain. Look for UV-resistant materials that won’t break down prematurely under intense sunlight for optimal performance in Texas conditions.
Panel Seals for Garage Doors
Multi-panel garage doors have additional sealing needs at each panel junction. Compression-style seals fit between panels and compress when the door opens and closes, while adhesive-backed V-strip seals can be retrofitted to doors with significant panel gaps. In Keller’s climate, compression-style seals generally outperform adhesive options due to their resistance to heat-induced adhesive failure during summer.
Tools and Materials Needed for Garage Door Weather Stripping Installation
A successful installation requires proper preparation. Gather the following essentials before beginning: a measuring tape (minimum length of 25 feet) for accurate door dimensions, a screwdriver or drill with the appropriate bits, a utility knife or scissors designed for cutting rubber and vinyl materials, and the proper weather stripping material selected for your specific door type and local climate. You’ll also need adhesive, nails, or screws as specified by the manufacturer, plus gloves and safety glasses to protect yourself during removal and installation.
Step-by-Step Guide on How to Install Garage Door Weather Stripping
Step 1 — Measure Your Garage Door Accurately
Precise measurements are critical for effective weather stripping installation. Measure the width of the door bottom to select appropriately sized bottom seals. Determine the height of both sides from the floor to the header and measure the top width between the installed side seals. Add one inch to each measurement to allow for trimming during installation. Record all measurements before purchasing materials to ensure you buy sufficient quantities.
Step 2 — Remove the Old, Worn-Out Weather Stripping
Before installing new seals, properly remove the old materials. Use a flathead screwdriver to remove staples, nails, or screws securing old weather stripping. Work systematically from one end to the other, avoiding damage to the door or frame. For adhesive-backed stripping, use a heat gun on a low setting to soften the adhesive before removal. Complete removal of old materials ensures the new weather stripping will seat properly against clean surfaces.
Step 3 — Clean and Prepare Surfaces for a Fresh Fit
Proper surface preparation has a significant impact on the effectiveness and longevity of seals. Remove debris, old adhesive, and rust from all mounting surfaces. Before proceeding, check for and garage door repair any rot or damage to wooden frames. Allow surfaces to dry thoroughly after cleaning. Taking time to prepare prevents premature failure of newly installed weather stripping.
Step 4 — Cut the New Weather Stripping to Fit
With clean surfaces ready, prepare your materials. Match each piece to the exact door dimensions using the measurements taken earlier. Make clean, straight cuts using sharp scissors or a utility knife against a straight edge; for bottom seals, cut to the exact width of the door. Side seals should reach from the floor to the header without gaps. Cutting all pieces before beginning installation allows you to focus on proper placement and fastening.
Step 5 — Install the Bottom Seal
The bottom seal installation typically comes first. Align evenly with the door’s bottom edge, ensuring equal extension on both sides. For T-style seals, slide the T portion into the track along the bottom of the door. For U-style seals, position the U channel over the bottom edge of the door. Securely fasten using appropriate hardware, typically at intervals of every 8-12 inches. The bottom seal should consistently make contact with the floor when closed, while allowing for smooth operation.
Step 6 — Install Side and Top Seals
With the bottom seal in place, move to the perimeter. Position side seals with the flexible portion facing the door. Ensure a tight but flexible fit that compresses slightly when the door closes. Use screws or nails based on seal type and manufacturer recommendations. Install the top seal last, overlapping somewhat with side seals at the corners. Proper tensioning of side and top seals is crucial—too tight restricts door operation, while too loose fails to create an effective barrier.
Step 7 — Inspect Your Work for Gaps and Light Leaks
After installation, thoroughly test the effectiveness of your new weather stripping to ensure it meets your expectations. Close the door and adjust the seals if light is peeking through from outside. Run your hand along the seals to feel for air movement—test for smooth door operation through a complete open and close cycle. A properly installed system should create a seamless barrier against the elements while maintaining easy door operation.
Common Mistakes to Avoid During Installation
- Using Incorrect Seal Material for Keller’s Climate
- Ignoring Surface Preparation Before Installing
- Over-tightening or Misaligning Seals
- Failing to Perform Light and Draft Tests
When Should You Replace Weather Stripping on Your Garage Door?
Weather stripping doesn’t last forever. Look for the necessary signs for replacement: visible cracks and tears in sealing materials, air drafts or water leaks during weather events, pest or dirt accumulation inside the garage near door edges, and noise during operation from damaged or hardened seals. Most quality garage door weather stripping in Keller typically lasts 2-5 years, depending on exposure and the quality of the material, although some premium products offer a longer service life.
Keller, TX Weather — How It Affects Garage Door Weather Stripping
Seasonal Shifts: Heat Expansion and Winter Contraction
Keller’s climate creates unique challenges for garage door sealing. Summer temperatures cause door frames to expand while simultaneously softening seal materials. Winter brings contraction that can create new gaps. Rapid temperature changes between seasons stress attachment points. These factors make seasonal inspection and adjustment particularly important for Keller homeowners.
High Winds and Debris Damage
North Texas wind events can damage garage door seals. Wind-driven debris causes physical damage to exposed sealing surfaces, and pressure differentials during storms can dislodge seals from their mounting surfaces. For homes in exposed locations, consider upgrading to heavy-duty weather stripping designed to withstand higher wind forces.
Preventative Maintenance Schedule
Proactive care extends the life of your weatherstripping investment. Inspect seals monthly, paying particular attention after extreme weather. Clean seals quarterly using mild soap and water, avoiding petroleum-based cleaners. Following a simple maintenance routine can double the effective lifespan of your weather stripping.
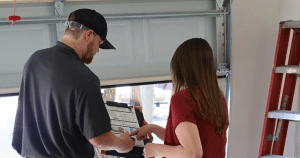
DIY vs. Professional Garage Door Weather Stripping in Keller, TX
DIY: Great for Small Fixes and Simple Seals
Many homeowners successfully tackle weather stripping installation themselves. It’s a cost-saving but time-consuming process, requiring 3-5 hours for a complete installation. DIY installation works well for homeowners who are comfortable with basic home maintenance tasks and standard new garage door configurations, allowing immediate problem resolution without scheduling delays.
Professional Service: Best for Precision and Longevity
For complex situations, professional installation offers significant advantages. Warranty-backed installations offer peace of mind, providing access to commercial-grade materials that are not readily available to the general consumer. Professionals provide customized solutions for Keller’s weather patterns, tailored to location-specific experience. Professional installation benefits homeowners with oversized doors, custom installations, or multiple door configurations.

Frequently Asked Questions
How often should garage door weather stripping be replaced in Keller, TX?
Most weather stripping in Keller requires replacement every 3-5 years, though this varies based on exposure, material quality, and garage orientation. South and west-facing doors typically need more frequent replacement due to increased sun exposure.
What’s the best type of weather stripping for Texas storms?
For Keller’s weather patterns, EPDM rubber bottom seals combined with vinyl-clad aluminum for side and top seals provide the best storm resistance. These materials withstand heat and occasional freezing while maintaining flexibility and water resistance.
Can I install garage door weather stripping without professional help?
Most homeowners with basic DIY skills can successfully install standard weather stripping. The process requires only common household tools, though specialized seals or unusual door configurations may benefit from professional installation.
Does new weather stripping reduce energy bills in Keller homes?
Properly installed weather stripping can reduce garage-related energy losses by up to 20% in attached garages. This translates to noticeable savings, particularly during extreme summer and winter when HVAC systems work hardest.
Why does my garage door still let in water after I replaced the weather stripping?
Water infiltration after replacement typically indicates an incorrect seal selection, improper installation technique, or unaddressed structural issues, such as settled concrete or warped door frames. A professional assessment can identify the specific cause and recommend appropriate solutions.
Conclusion
Properly installed garage door weather stripping is the unsung hero for any Keller, TX, homeowner. It shields your garage from Texas’s harsh weather, reduces energy loss, and keeps pests and dirt outside, where they belong.
Learning how to install garage door weather stripping may seem daunting initially, but with proper preparation and the right materials, it’s a manageable project that delivers immediate benefits. For homeowners seeking maximum protection and efficiency, Keller TX Garage Door provides the expertise and materials to ensure your garage remains sealed adequately against the various challenges that Texas weather can present.
END NOTE
If you need a trusted company for the best garage door weather stripping solutions, Keller TX Garage Door is here to help. We offer high-quality weather stripping products and expert garage door services designed to withstand Keller, TX’s climate, ensuring long-term protection and energy savings.
Our skilled team ensures your garage is sealed, safe, and energy-efficient all year round while providing the knowledge you need to install garage door weather stripping properly. Visit our website to meet our professionals or check our Service Areas page to confirm if we serve your neighborhood. Need a reliable upgrade? Schedule a service today!